When the power goes out, the transfer switch is the part that decides whether your backup plan feels controlled or chaotic. A good generator transfer switch installation guide helps you understand what the switch does, what it should power, and where DIY stops and licensed electrical work begins.
For most homeowners, the biggest mistake is not buying the wrong generator. It is pairing a decent generator with the wrong transfer setup, then realizing too late that key circuits were left out, wattage was misjudged, or the installation does not meet code. If you are comparing generators and accessories, this is one of the most important planning steps to get right.
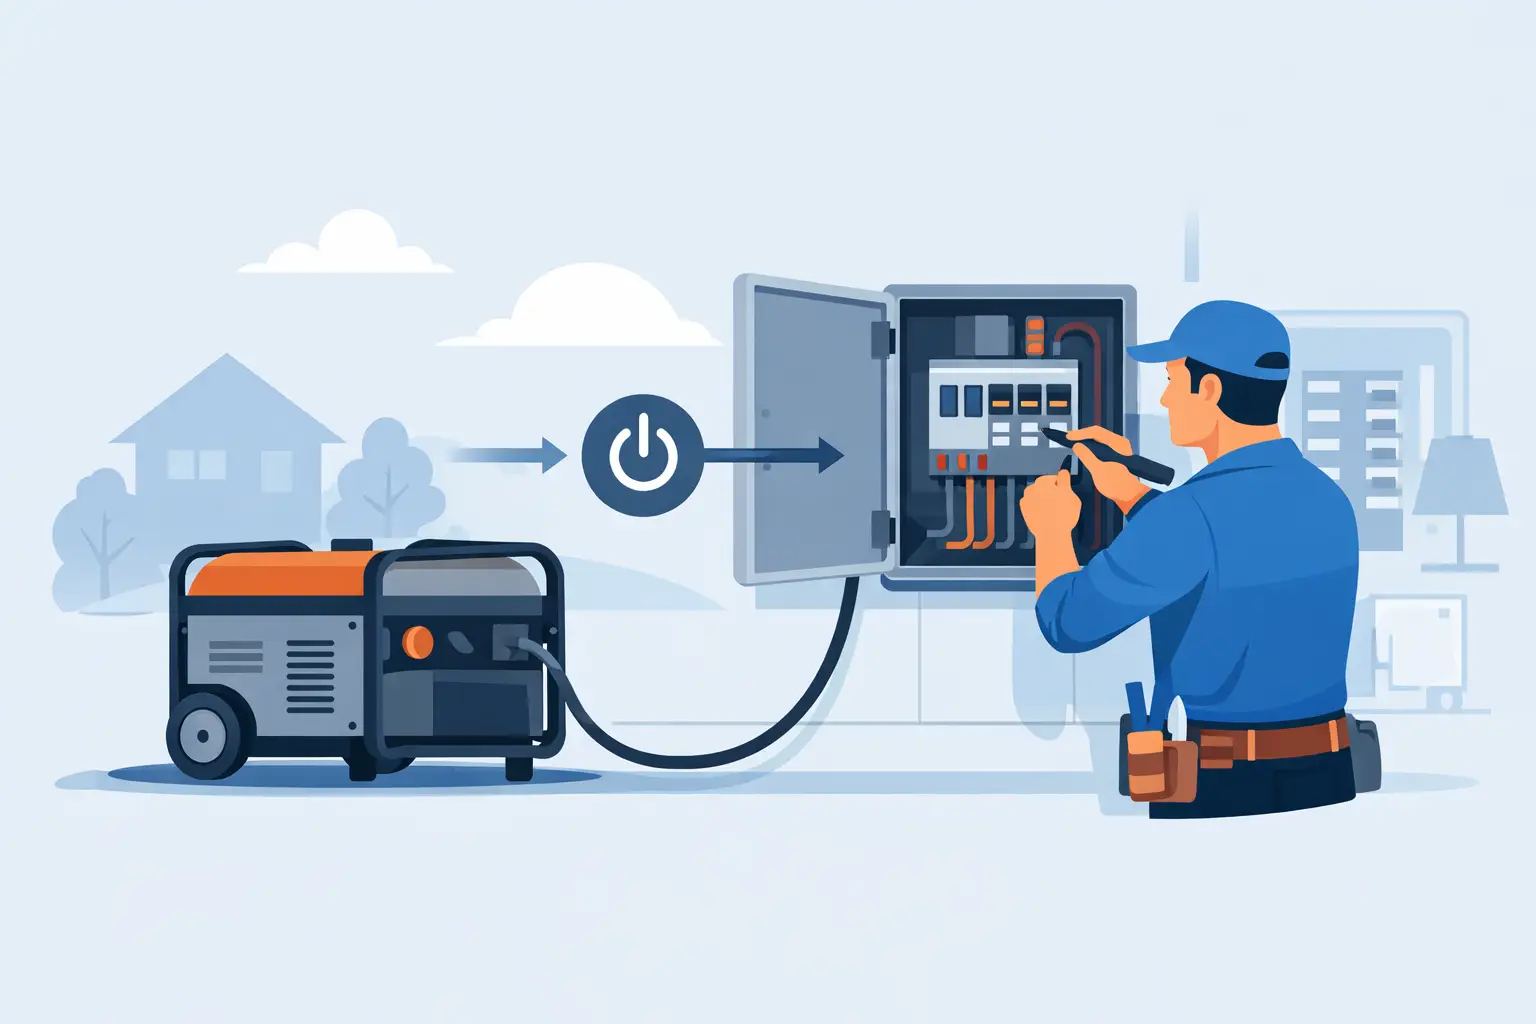
What a transfer switch actually does
A transfer switch safely moves selected household circuits from utility power to generator power. That sounds simple, but the safety role is critical. It prevents backfeeding, which is when generator electricity flows into utility lines where it does not belong. Backfeeding is dangerous for utility crews, your home, and your equipment.
In practical terms, the transfer switch gives you a controlled way to run essentials like the refrigerator, furnace blower, sump pump, internet equipment, lights, or a well pump during an outage. Without one, you are left with extension cords or unsafe workarounds that do not scale well for whole-home needs.
There are two common styles. A manual transfer switch requires you to start the generator and physically switch selected circuits over. An automatic transfer switch is typically paired with a standby generator and shifts power over on its own when utility power fails. For portable generator owners, manual transfer switches and interlock-based setups are the most common options, though local code and panel compatibility matter.
Before any installation, match the switch to the generator
This is where many buyers need a reality check. The transfer switch is not just about the panel. It has to match your generator’s output, voltage, receptacle type, and intended load.
If your generator delivers 30 amps at 120/240 volts, your transfer equipment and inlet need to support that configuration. If you step up to a 50-amp portable generator, the switch, breaker sizing, power inlet, and cord set all need to reflect that higher capacity. Buying a larger transfer switch than you need is not automatically a bad move, but it only helps if the rest of the system is designed around it.
Circuit planning matters just as much. A six-circuit manual transfer switch may be fine for a small backup plan, but it can feel cramped fast if you want to cover refrigeration, heating, lighting, garage door operation, microwave use, and a few outlet circuits. On the other hand, overspending on a large setup for a generator that can only support a handful of loads is not efficient either.
The right fit depends on how you want to live during an outage. Some homeowners only want survival loads. Others want near-normal operation. That difference should guide both generator sizing and switch selection.
Generator transfer switch installation guide: what the job includes
A true generator transfer switch installation guide should be honest about the scope. This is usually not a simple plug-and-play accessory. In most cases, the installation includes mounting the switch near the main panel, installing or connecting a power inlet box, running conduit or cable between components, moving or re-routing selected branch circuits, labeling circuits clearly, and testing operation under load.
If you are installing an automatic transfer switch for a standby generator, the work becomes more involved. You may need utility coordination, fuel connection work, permit approval, load management setup, and full integration between the generator controller and the home electrical system.
For manual switches used with portable generators, the job is more limited, but it still involves the service panel. That means code compliance, proper overcurrent protection, grounding and bonding awareness, and safe isolation from utility power. For most readers, this is professional electrician territory.
What you can do yourself before the electrician arrives
Even if you are not doing the final wiring, you can make the installation smoother and cheaper by preparing well.
Start by listing the circuits you actually want backed up. Include the running wattage and startup wattage for motor-driven loads like refrigerators, freezers, sump pumps, and well pumps. This helps prevent the common problem of choosing a switch layout that looks good on paper but overloads the generator in real use.
Next, verify your generator’s outlet configuration. A portable model with an L14-30 outlet supports a different setup than one with a 14-50 outlet. You also want to confirm whether the generator is neutral bonded or floating, because that can affect transfer-switch compatibility and safe operation depending on the system design.
Then look at physical placement. The generator should operate outdoors, away from doors, windows, and attached garages. The power inlet location should support a practical cord run without creating tripping hazards or forcing the generator into an unsafe position during bad weather.
Finally, check local code requirements. Permit rules vary by area, and some jurisdictions are stricter than others about transfer equipment, inlet boxes, and interlock use.
Manual transfer switch vs interlock kit
If you are still shopping, this is the comparison that often matters most.
A manual transfer switch gives you dedicated backed-up circuits. It is straightforward, easy to label, and beginner-friendly during an outage. You know exactly what the generator can power because those circuits were selected in advance. The trade-off is flexibility. If you did not include a circuit, you cannot power it without changing the installation later.
An interlock kit works differently. It allows your main panel to accept generator input while mechanically preventing the main utility breaker and generator backfeed breaker from being on at the same time. This gives you more flexibility because you can choose which branch circuits to use at the panel, as long as total load stays within generator capacity.
The downside is that interlock kits are more panel-specific, require careful load management, and can be less intuitive for some users under outage stress. Neither option is universally better. Manual switches are often better for homeowners who want simplicity. Interlocks can make more sense if you want broader circuit access and your panel supports a listed kit.
Common installation mistakes to avoid
The most expensive mistakes usually happen before the first wire is landed. One is underestimating startup loads. A generator that runs a refrigerator just fine may struggle when the fridge, sump pump, and furnace blower all start at once.
Another is choosing a switch based only on circuit count instead of amperage and real usage. Six circuits sounds fine until two of them are multi-room lighting circuits and another includes kitchen outlets with unpredictable demand.
Neutral handling is another area where confusion shows up. Portable generator systems can get tricky depending on whether the neutral is switched, bonded, or floating. This is not a detail to guess on.
Poor labeling also creates problems. In an outage, nobody wants to stand at the panel trying to remember whether “bedroom outlets” also includes the modem or whether “basement lights” shares a load with the freezer. Clear circuit labeling is part of a good installation, not an afterthought.
What installation usually costs
Costs vary widely based on switch type, local labor rates, permit fees, and how difficult the panel access is. A basic manual transfer switch installation for a portable generator generally costs far less than an automatic transfer switch paired with a standby unit, but the final number still depends on inlet placement, wiring distance, and whether your panel needs updates.
If you are comparing quotes, make sure each one covers the same scope. Some include the inlet box and testing. Others price only the switch install itself. A cheaper quote can stop looking cheap once add-ons appear.
This is one area where value matters more than bargain pricing. A clean, code-compliant installation protects your generator investment and makes outages easier to manage for years.
A smart buying checklist before you commit
If you are using this generator transfer switch installation guide while still shopping, focus on four questions. First, how many circuits do you really need during an outage? Second, what is your generator’s actual usable output at 120/240 volts? Third, do you want simple preselected circuits or more panel-level flexibility? Fourth, is your existing panel compatible with the equipment you are considering?
Those answers will narrow your options quickly. They also make it easier to compare transfer switches, inlet boxes, cords, and generator receptacle compatibility without getting lost in specs that do not apply to your setup.
At TopGeneratorsOnline, we see a lot of buyers focus on generator wattage first and switching equipment second. The better approach is to treat them as one system. A well-matched transfer switch setup makes a backup generator feel more useful, more predictable, and a lot less stressful when the lights go out.
If you are close to buying, think beyond the outage itself. Choose the setup your household can use confidently in the dark, in the rain, and under pressure. That is usually the one worth installing.